Vacation 20th Dec - 30th Dec


I will be on vacation from 20th Dec to 30th Dec.

Made-to-order amigurumi purchases made after 8th December will only be shipped out in Jan 2017.
Safety eyes purchases made after 18th Dec will only be shipped out in Jan 2017
Pattern purchases are not affected.

Amazon store will be on vacation from 8th December. Etsy store will remain open with adjusted turnaround times.

Sorry for the inconvenience and thanks for the support this year.

Happy holidays!!

Merlion Amigurumi Pattern (Free)

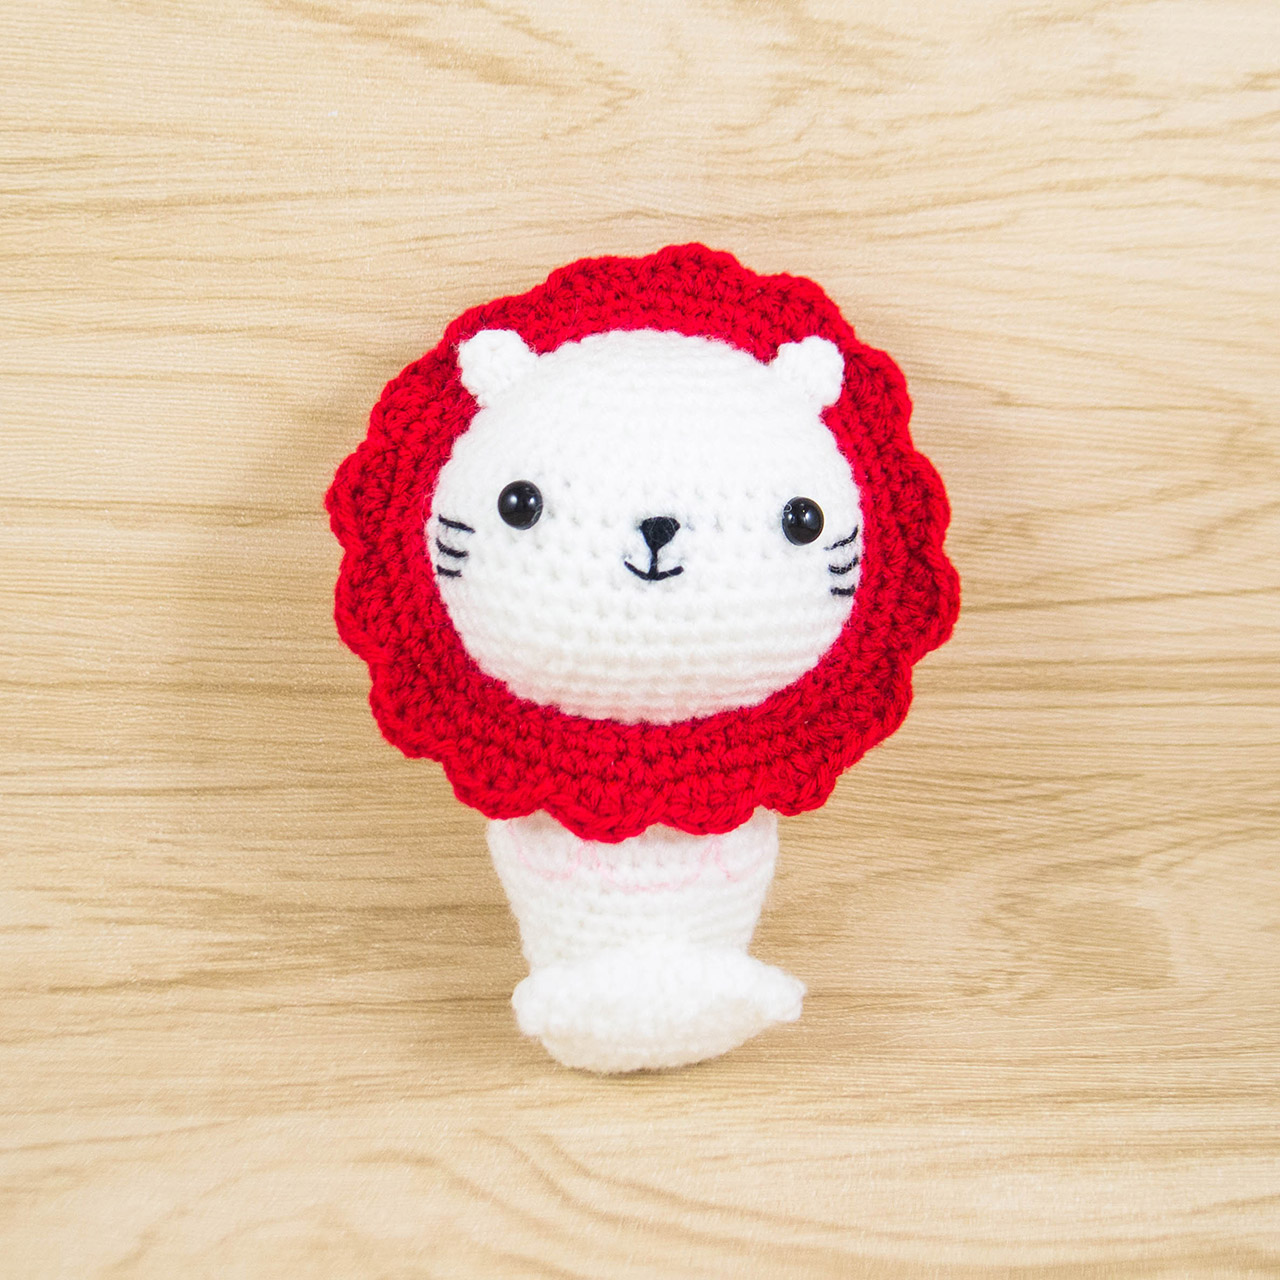
Did a cute version of the Singapore Merlion last year and had requests for the pattern. Finally finish writing it!


This is a free pattern, please do not sell this pattern or claim it as your own. If you want to share this pattern, please link back to this page.

Materials:

Using fingering yarn with 2.5mm hook will produce a Merlion of about 11cm/4.3in tall.
All yarn threads are assumed to be of the same thickness.
-White
-Red yarn
-Light Pink Embroidery Thread
-Black Embroidery Thread
-Safety Eyes 6mm x 2 (based on fingering yarn, use a bigger size if using a thicker yarn)
-Stuffing

Abbreviations:
sc - single crochet
sc inc - single crochet increase
sc dec - single crochet decrease
ss - slip stitch
ch - chain stitch
hdc - half double crochet
dc - double crochet
dc inc - double crochet increase
bo - bobble stitch with 3 double crochet
Rnd – Round

Head & Body
With white yarn,
Rnd 1: 6sc into magic ring (6)
Rnd 2: sc inc x 6 times (12)
Rnd 3: (sc, sc inc) x 6 times (18)
Rnd 4: (2 sc, sc inc) x 6 times (24)
Rnd 5: (3 sc, sc inc) x 6 times (30)
Rnd 6: (4 sc, sc inc) x 6 times (36)
Rnd 7: (5 sc, sc inc) x 6 times (42)
Rnd 8: (6 sc, sc inc) x 6 times (48)
Rnd 9 - Rnd 15 (7 rnds): sc all around (48)
Rnd 16: (6 sc, sc dec) x 6 times (42)
Rnd 17: (5 sc, sc dec) x 6 times (36)
Rnd 18: (4 sc, sc dec) x 6 times (30)
Rnd 19: (3 sc, sc dec) x 6 times (24)
Rnd 20: (2 sc, sc dec) x 6 times (18)

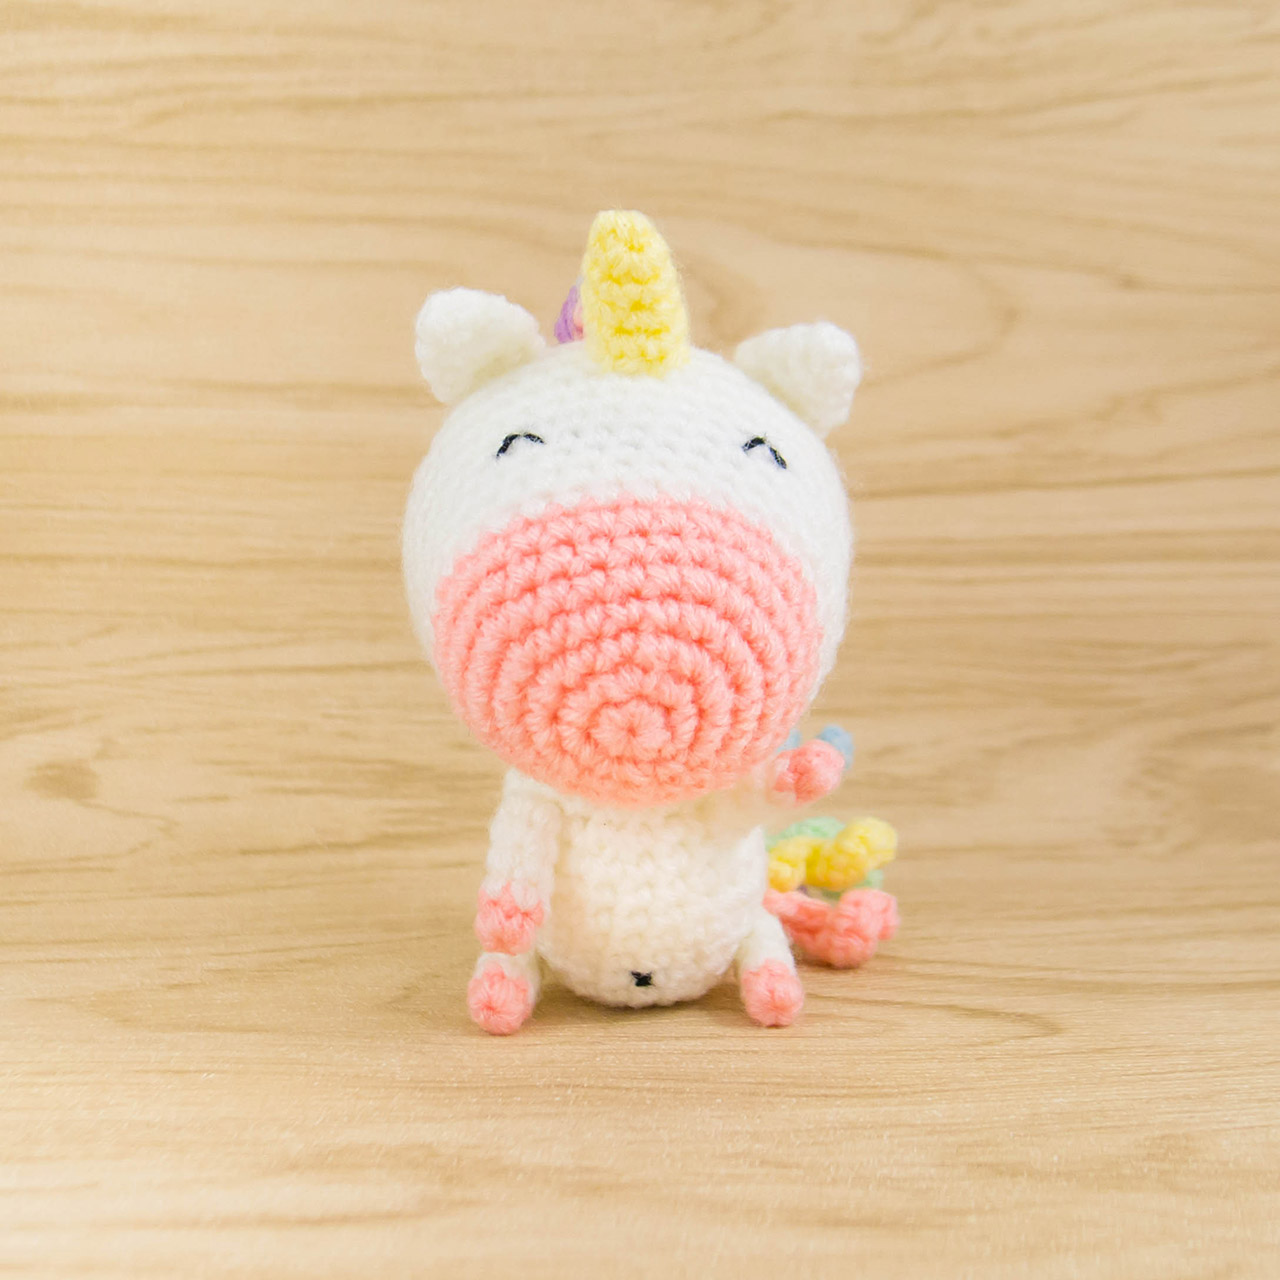
Insert the eyes between Rnd 10 - Rnd 11, about 8 stitches apart.
Sew the nose and mouth from Rnd 11 - Rnd 12.
Sew whiskers from Rnd 11 - Rnd 13

Rnd 21: (2 sc, sc inc) x 6 times (24)
Rnd 22: (3 sc, sc inc) x 6 times (30)
Rnd 23 - Rnd 24 (2 rnds): sc all around (30)
Rnd 25: (4 sc, sc inc) x 6 times (36)
Rnd 26: sc all around (36)
Rnd 27: (4 sc, sc dec) x 6 times (30)
Rnd 28: (3 sc, sc dec) x 6 times (24)
Rnd 29: sc all around (24)
Rnd 30: (6 sc, sc dec) x 3 times (21)
Rnd 31: sc all around (21)
Rnd 32: (5 sc, sc dec) x 3 times (18)
Rnd 33: sc all around (18)

Put stuffing in.

Rnd 34: (4 sc, sc dec) x 3 times (15)
Rnd 35: (4 sc, sc inc) x 3 times (18)
Rnd 36: (8 sc, sc inc) x 2 times (20)
Rnd 37 - Rnd 40 (4 rnds): sc all around (20)

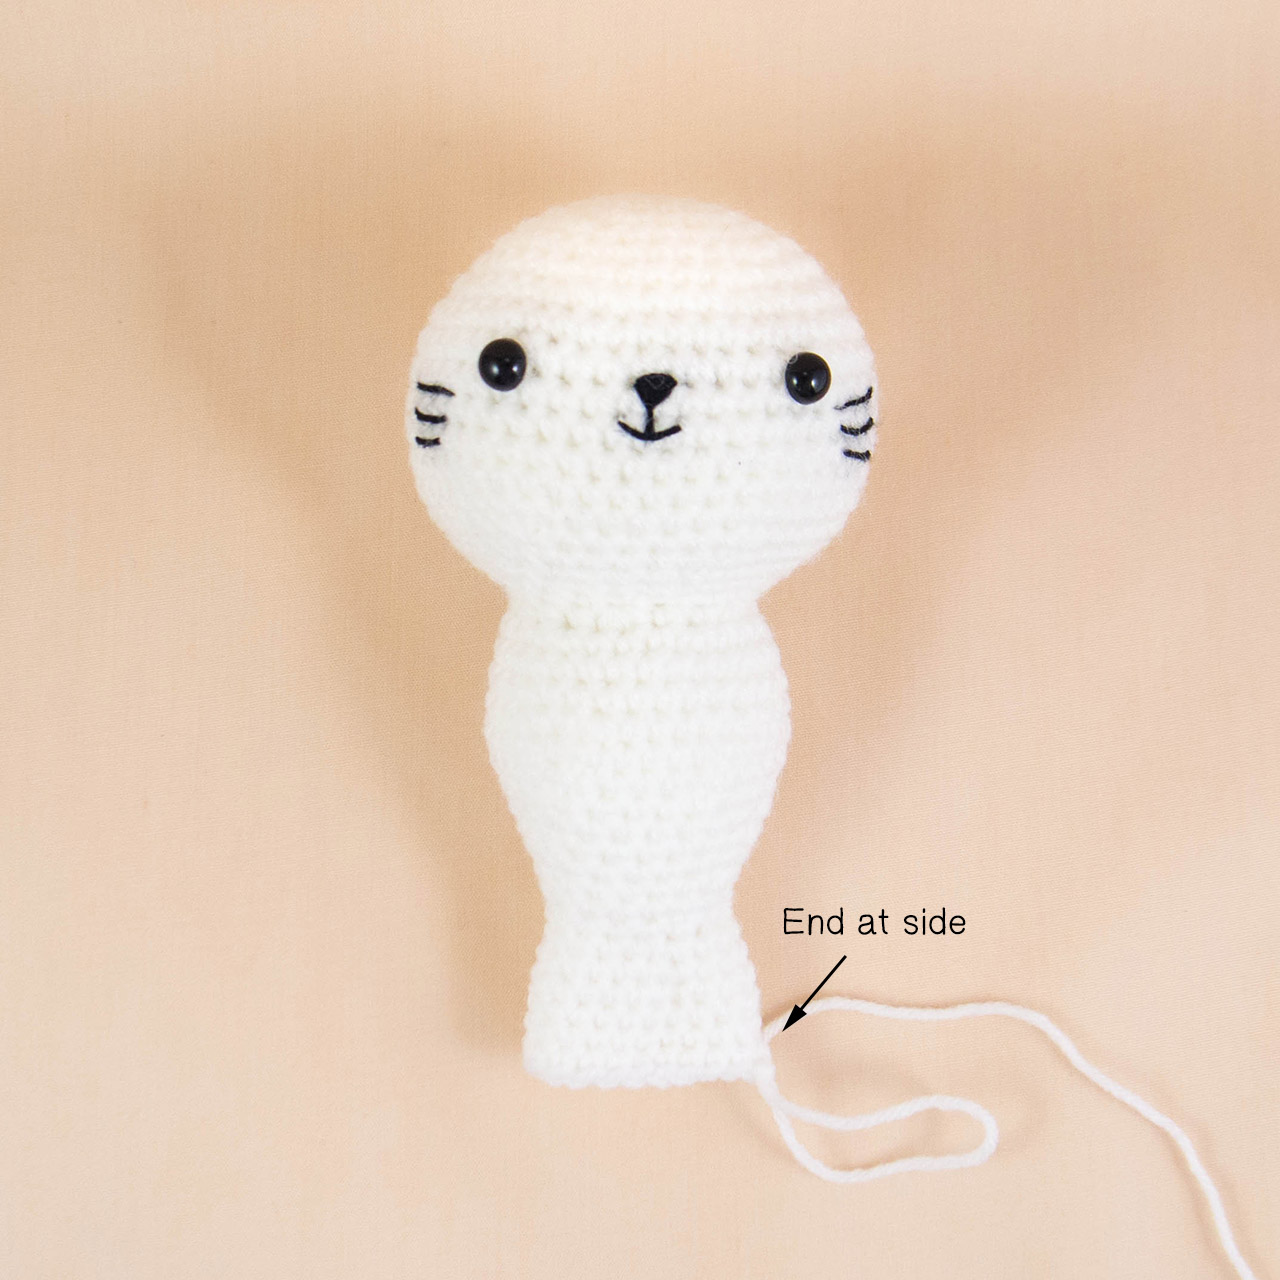
Add a few stitches until Rnd 40 end at the side of the merlion.


Rnd 41: hdc, dc inc, ss, hdc, dc inc, hdc, ss, (hdc, dc inc, ss) x 2 times,
             hdc, dc inc, hdc, ss, hdc, dc inc, ss (26)

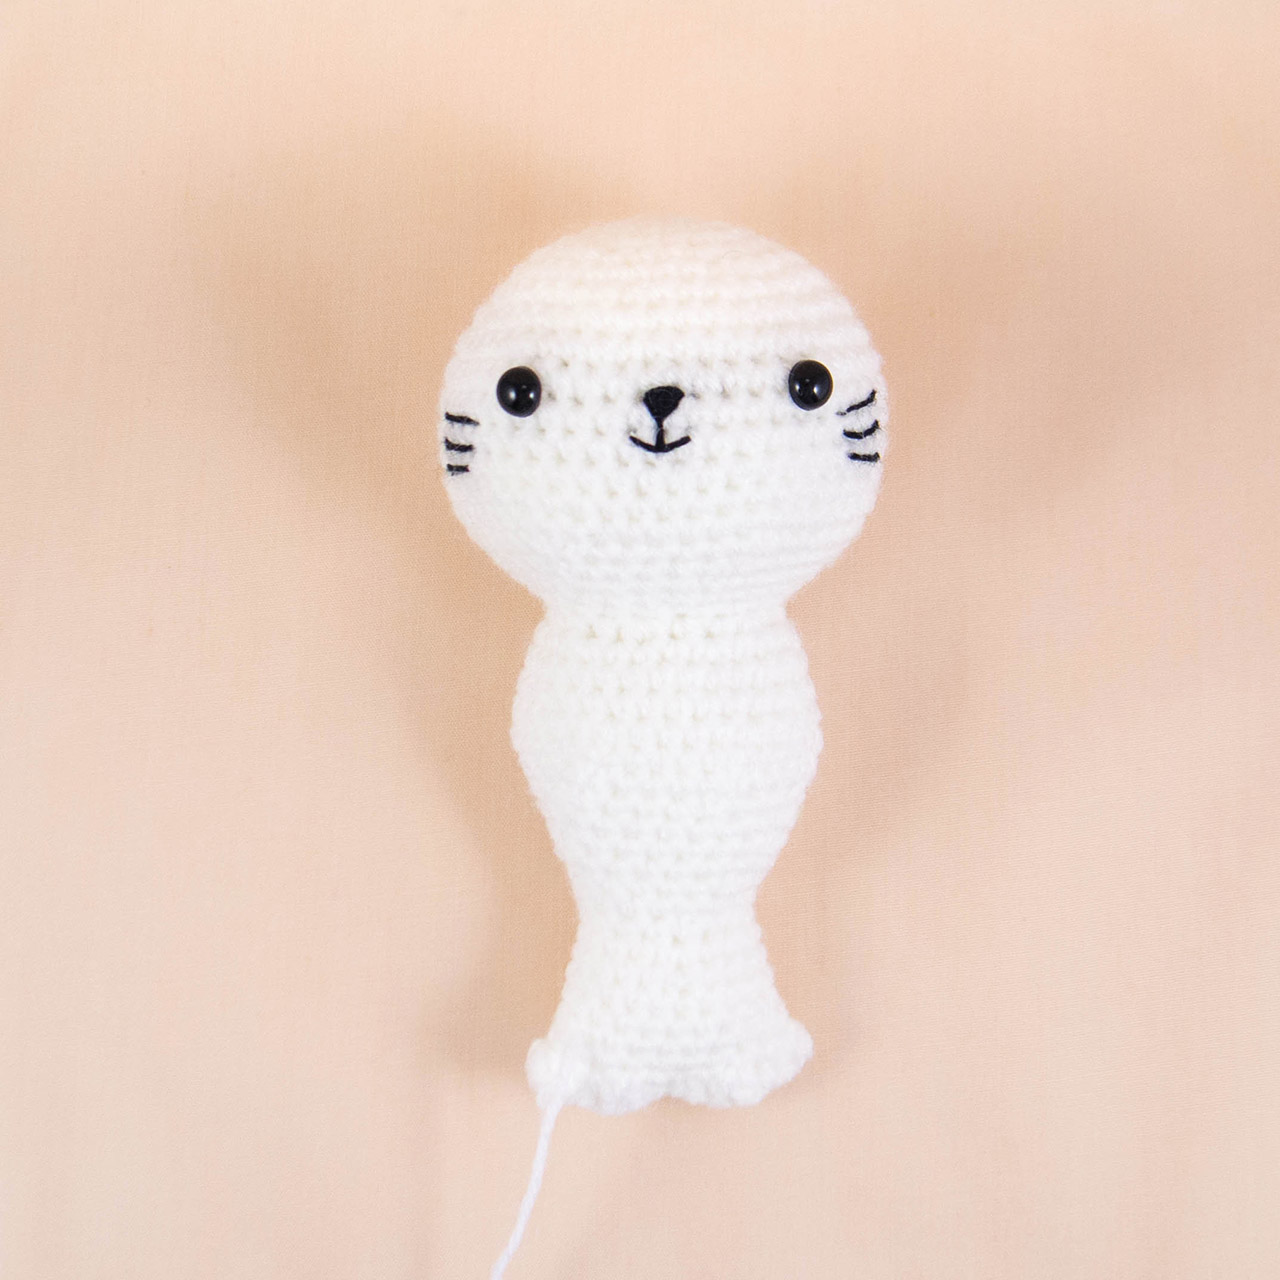
Stuff the tail portion lightly as you need to fold it later.

Flatten the tail portion and sew the hole close.
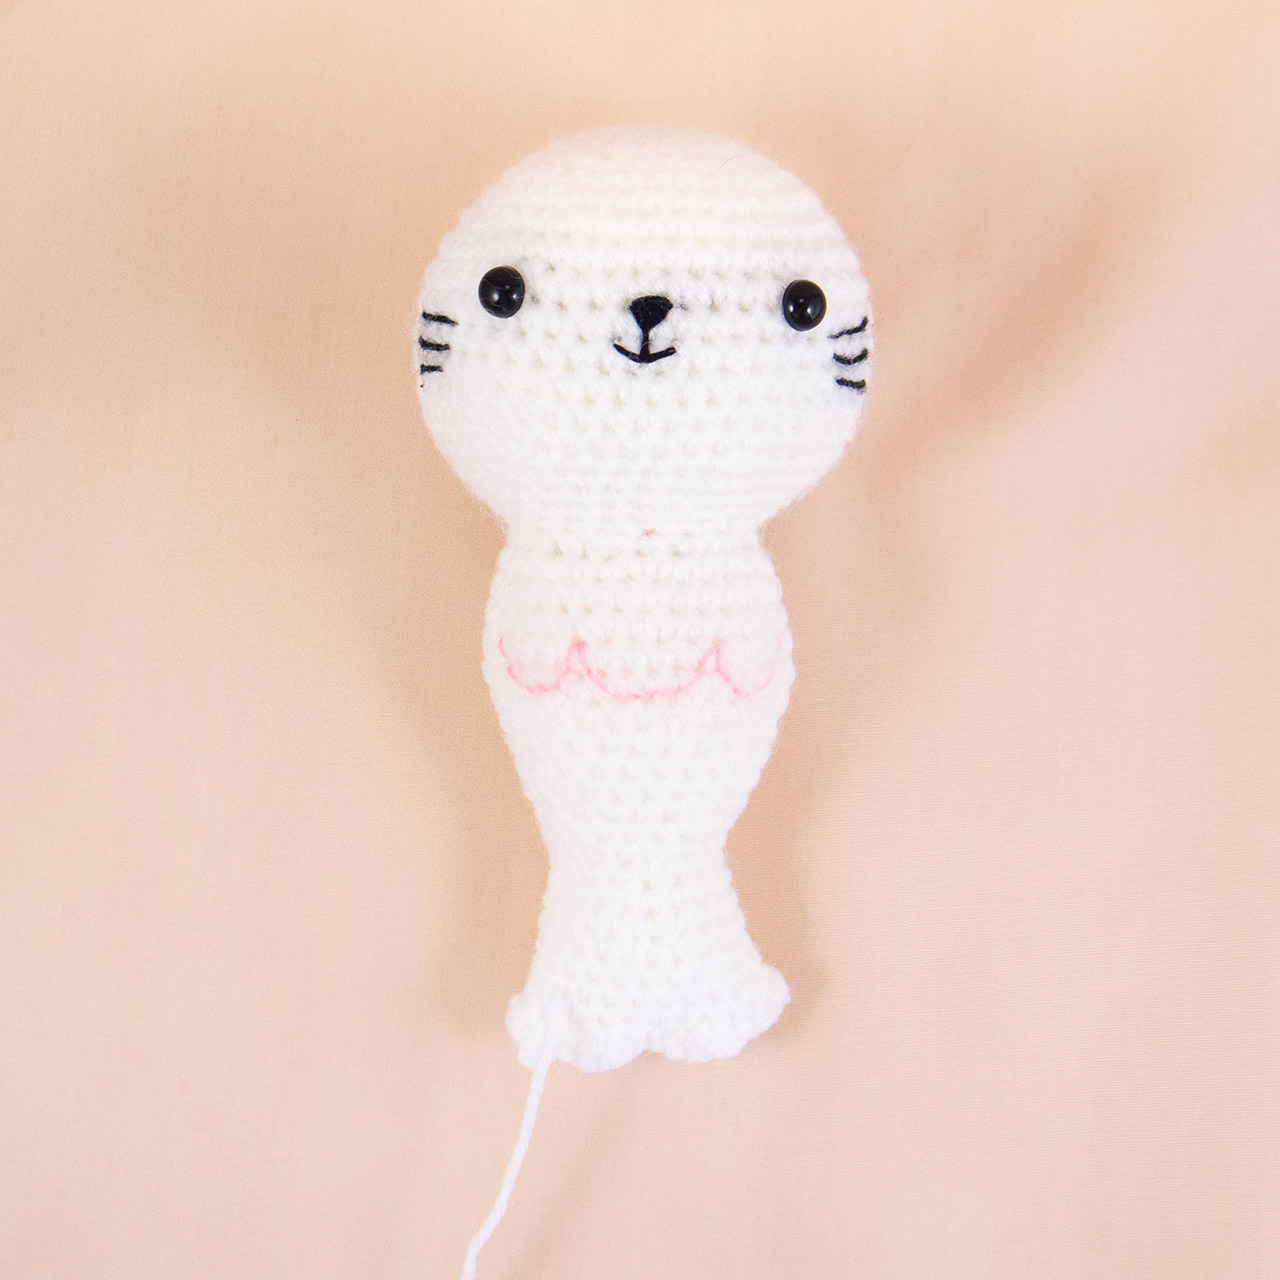

Body Details
With light pink embroidery thread, sew a wave pattern from Rnd 25 – Rnd 27.
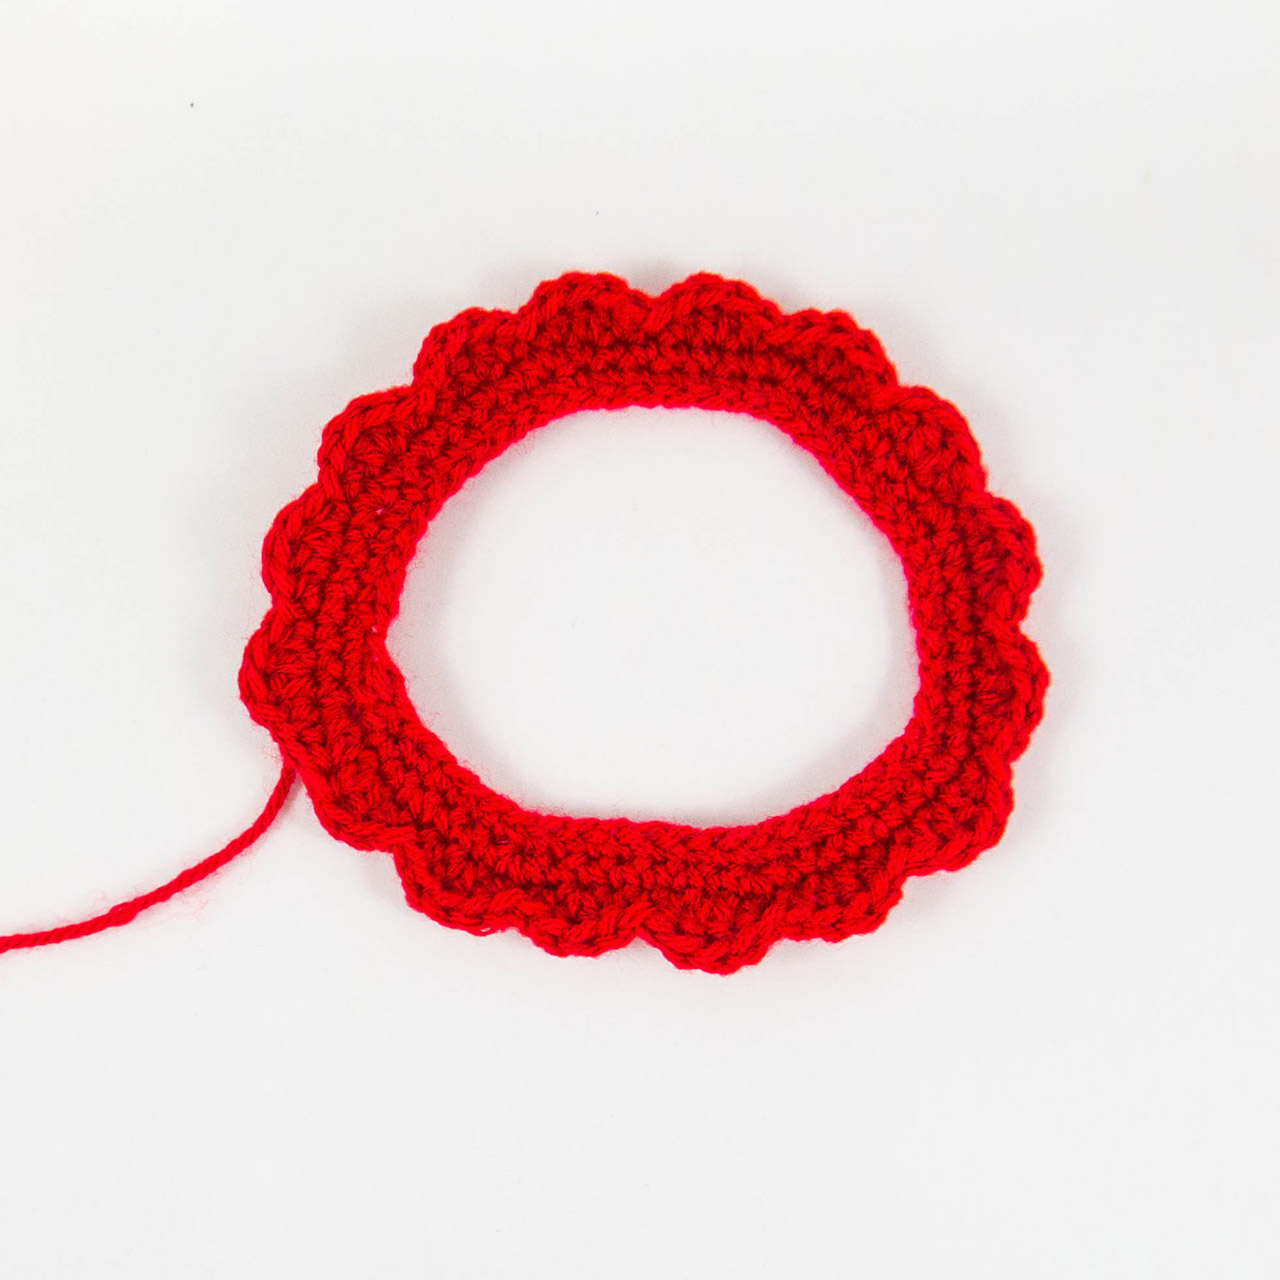
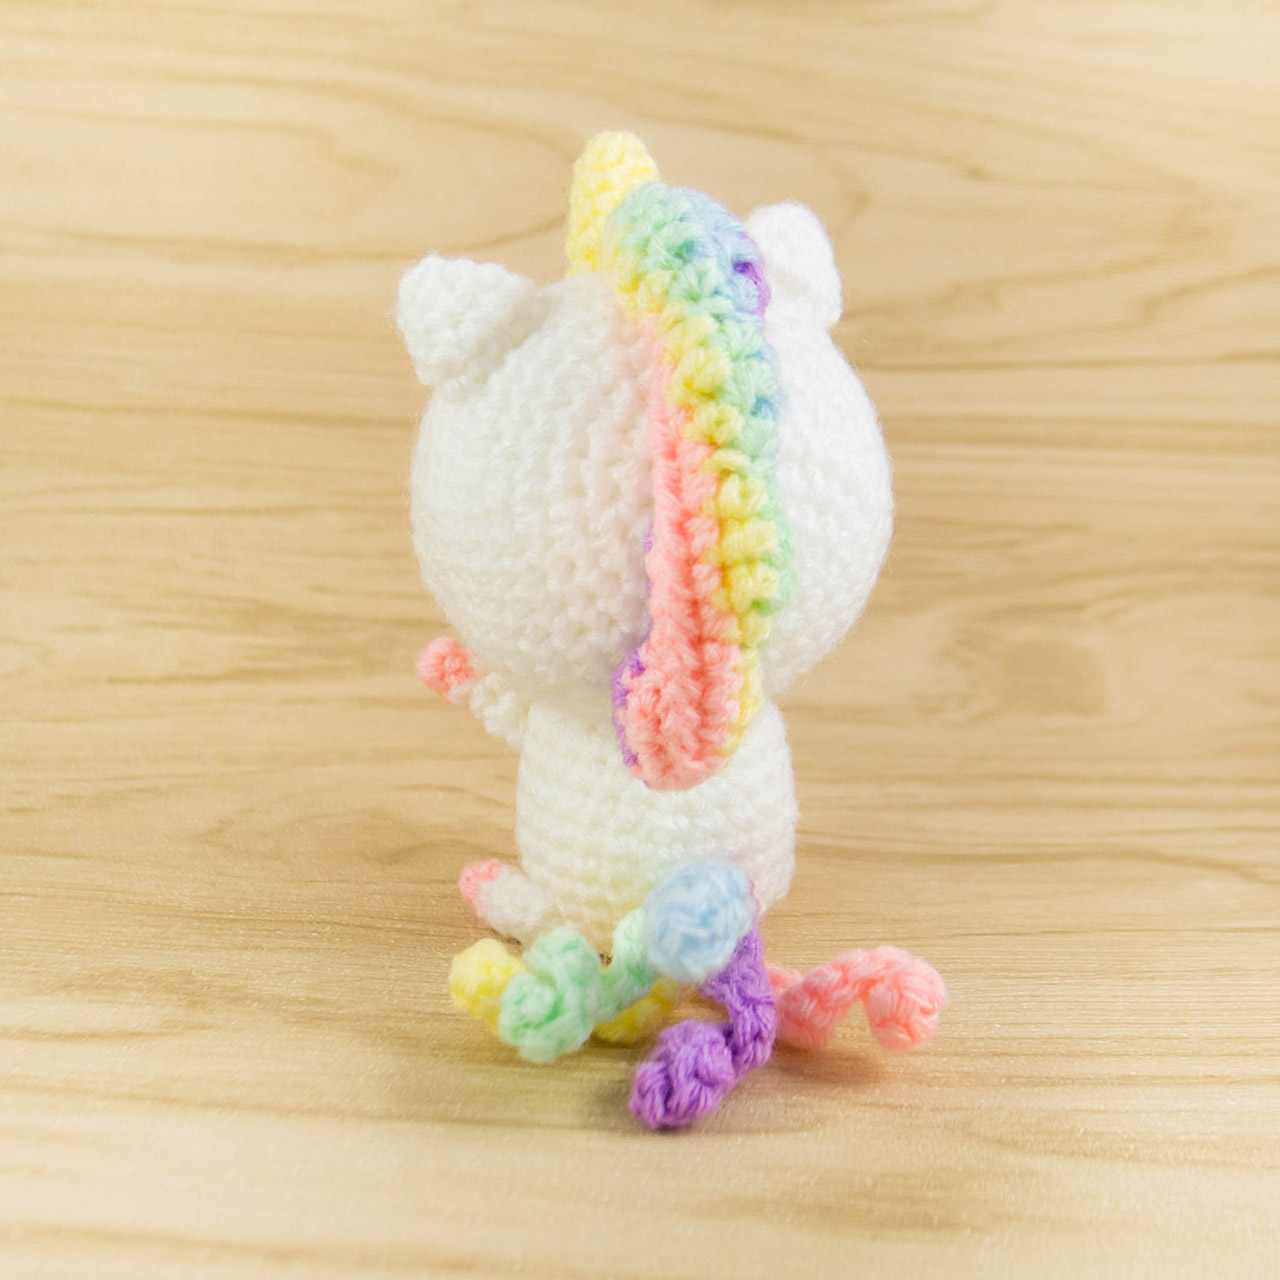

Mane
With red yarn,
Rnd 1: ch 56, ss to make into a ring (56)
Rnd 2: sc all around (56)
Rnd 3: (6 sc, sc inc) x 8 times (64)
Rnd 4: (hdc, dc inc, hdc, ss) x 16 times (80)

Fasten off and leave a length of yarn for sewing

(Note: The mane may curl up and you may want to block it to make it lay flat.)


Ears (Make 2)
With white yarn,
Rnd 1: 4sc into magic ring (4)
Rnd 2: (sc, sc inc) x 2 times (6)

Fasten off, leaving a length of yarn for sewing.

Assembly
Sew the mane to the head.


Sew the ears to the head.

Fold up the tail and sew it to secure it.


Hope you enjoy the pattern!

Pop-up store!


I am participating in my first pop-up store! The pop-up store is at The People's Avenue, Orchard Gateway #02-01 and will be opened daily from 11am - 10pm until 20th July. There are a lot of other items by local crafters as well such as handmade cards, key holders, pouches, bags, necklaces, bracelets and many more. Do drop by to support local handmade! :)

Back From Vacation!


I am back from vacation! Hope everyone had a great week last week :)

All the shops are up and I will be processing orders placed during the vacation period. Thanks for waiting!

Vacation Notice!


I will be on vacation from 23 March to 4 April.
If you want your orders to be processed before I go on vacation, order by 9th March (GMT+8) for made-to-order amigurumi and by 21st March for safety eyes.
Amazon shop will be on vacation mode on 10th March and Etsy shop on 22nd March.
Website (http://snacksies.com) will still be operating but any orders after the dates mentioned will only be processed after I come back!

LINE Moon Crochet Amigurumi Pattern (Free)

I had a few requests for pattern on the LINE Moon that I did quite a while back. So here it is! :)


This is a free pattern, please do not sell this pattern or claim it as your own. If you want to share this pattern, please link back to this page. If you are selling the finished doll, please credit Snacksies Handicraft Corner for the design.

Materials:

Using fingering yarn with 2.5mm hook will produce a Moon of about 12cm/4.7in tall.

All yarn threads are assumed to be of the same thickness.
White yarn
Black embroidery thread
Fabric Glue
Felting needle + pink felting wool OR pink felt and glue
Stuffing

Abbreviations:
sc - single crochet
sc inc - single crochet increase
sc dec - single crochet decrease
ch - chain
sc3tog - single crochet 3 together

Head & Body
With white yarn,
Rnd 1: 6sc into magic ring    (6)
Rnd 2: sc inc x 6 times    (12)
Rnd 3: (sc, sc inc) x 6 times    (18)
Rnd 4: (2 sc, sc inc) x 6 times    (24)
Rnd 5: (3 sc, sc inc) x 6 times    (30)
Rnd 6: (4 sc, sc inc) x 6 times    (36)
Rnd 7: (5 sc, sc inc) x 6 times    (42)
Rnd 8: (6 sc, sc inc) x 6 times    (48)
Rnd 9: (7 sc, sc inc) x 6 times    (54)
Rnd 10 - Rnd 17 (8 rnds): sc all around    (54)
Rnd 18: (7 sc, sc dec) x 6 times    (48)
Rnd 19: (6 sc, sc dec) x 6 times    (42)
Rnd 20: (5 sc, sc dec) x 6 times    (36)
Rnd 21: (4 sc, sc dec) x 6 times    (30)
Rnd 22: (3 sc, sc dec) x 6 times    (24)

*With black embroidery thread, sew eyes between Rnd 10 - 13, 3 stitches apart
*Sew a loose straight line in middle of Rnd 14. Use your fingers to make a curve and use fabric glue to retain the curve.
*Sew a loose straight line at Rnd 15. Use your fingers to make a curve and use fabric glue to retain the curve.

Rnd 23: (3 sc, sc inc) x 6 times    (30)
Rnd 24 - Rnd 25 (2 rnds): sc all around    (30)
Rnd 26: (4 sc, sc inc) x 6 times    (36)
Rnd 27 - Rnd 29 (3 rnds): sc all around    (36)
Rnd 30: (4 sc, sc dec) x 6 times    (30)
Rnd 31: (3 sc, sc dec) x 6 times    (24)
Rnd 32: (2 sc, sc dec) x 6 times    (18)

*Put in the stuffing

Rnd 33: (sc dec) x 6 times     (9)
Rnd 34: (sc, sc dec) x 6 times     (6)

Fasten off and sew the hole close

Hands
(Make 2)
Rnd 1: 5sc into magic ring    (5)
Rnd 2: sc inc x 5 times    (10)
Rnd 3: sc all around    (10)
Rnd 4: (2 sc, sc3tog) x 2 times   (6)
Rnd 5 - Rnd 6 (2 rnds): sc all around    (6)

Fasten off, leaving a length of yarn for sewing
*Put stuffing into leg

Legs
(Make 2)
Rnd 1: 5sc into magic ring    (5)
Rnd 2: sc inc x 5 times    (10)
Rnd 3: sc all around    (10)
Rnd 4: 3 sc, sc dec x 2 times, 3 sc   (8)
Rnd 5: sc all around    (8)
Rnd 6: (3 sc, sc inc) x 2 times    (10)
Rnd 7 - Rnd 8 (2 rnds): sc all around    (10)

Fasten off, leaving a length of yarn for sewing
*Put stuffing into leg


Assembly
Sew the hands to the body

Sew the legs to the body

Happy New Year!


Happy New Year! 2015 had really gone by in a flash for me! Had lots of wonderful support from a lot of people for my amigurumis and I am really grateful for it :)

Hope to create more designs in 2016 and catch up with my long queue of patterns that I want to write. Also hope to be able to start my amigurumi workshops this year :) Looking forward to the new year!