Cute Version of Singapore's Merlion for 2nd World Amigurumi Exhibition

I am participating in this year's World Amigurumi Exhibition too.

World Amigurumi Exhibition vol. 2: Crocheted Culture Celebration! will be held from 11 Dec 2015 - 29 Feb 2016 at Resobox in New York. Each contributing artist is required to submit a piece representing their country and so there will be over 100 cultural pieces from 46 countries :)
This is the piece I have come up with : cute version of Singapore's Merlion in Singapore Flag colors!


Do drop by the exhibition if you are in New York. Admission is free. Visit http://resobox.com/amigurumi-world-15/ for more information :)

Kito the Fox

Finally finish making a fox I wanted to do for quite some time.


Spent quite some time figuring out the best way to make the cream chest area and am quite satisfied with how it turns out! :)

And I am finally on Handmade@Amazon! If you do not know yet, Amazon has opened a handmade section just last weekend :)

Need to spend the next 2 weeks working on amigurumis for the upcoming Public Garden market and amigurumi exhibition in New York!

Captain America Amigurumi Pattern (Free)

I received a pattern request for the Captain America I did recently. Finally managed to squeeze some time to write it out :)


This is a free pattern, please do not sell this pattern or claim it as your own. If you want to share this pattern, please link back to this page. If you are selling the finished dolls, please credit Snacksies Handicraft Corner for the pattern and The Geeky Hooker for the design.


Materials:

Using DK yarn with 4mm hook will produce a Captain America of about 12cm/ 4.7in tall.

All yarn threads are assumed to be of the same thickness unless stated.
Flesh colored yarn
Light Blue yarn
Red yarn
White Yarn
White yarn of about half thickness than the rest (for the small star on the shield)
White Embroidery Thread
Safety Eyes 9mm x2 (based on DK yarn, use a bigger size if using a thicker yarn)
Stuffing

Abbreviations:
sc - single crochet
sc inc - single crochet increase
sc dec - single crochet decrease
ss - slip stitch
ch - chain stitch
dc - double crochet
tr - treble crochet
Rnd - Round

Head & Body
Note: All rounds start with light blue yarn unless otherwise stated. There will be color changes in the middle of some rounds and these will be indicated in ().

Note 2: Due to the differences in the crochet hook and yarn used, you may need to make color changes between beige and light blue a stitch earlier or later than stated so that a straight line is formed for the edge of the face.

With light blue yarn,
Rnd 1: 7sc into magic ring (7)
Rnd 2: sc inc x 7 times (14)
Rnd 3: (sc, sc inc) x 7 times (21)
Rnd 4: (2 sc, sc inc) x 7 times (28)
Rnd 5: (3 sc, sc inc) x 7 times (35)
Rnd 6: (4 sc, sc inc) x 7 times (42)
Rnd 7: (5 sc, sc inc) x 7 times (49)
Rnd 8 - Rnd 11 (4 rnds): sc all around (49)
Rnd 12: 24 sc, (change beige) sc, (light blue) 24 sc (49)
Rnd 13: (5 sc, sc dec) x 2 times, (change beige) (5 sc, sc dec) x 3 times, (light blue) (5 sc, sc dec) x 2 times (42)
Rnd 14: (4 sc, sc dec) x 2 times, sc, (change beige) 3 sc, dec, (4 sc, sc dec) x 2 times, sc, (light blue) 3 sc, dec, 4 sc, sc dec (35)
Rnd 15: (3 sc, sc dec) x 2 times, sc, (change beige) 2 sc, dec, (3 sc, sc dec) x 2 times, sc, (light blue) 2 sc, dec, 3 sc, sc dec (28)
Rnd 16: sc dec all around (14)

*Insert eyes between Rnd 11-12, 8 stitches apart. Make sure the eyes are centralized above the face.

Rnd 17: sc inc all around (28)
Rnd 18: (3 sc, sc inc) x 7 times (35)
Rnd 19 - Rnd 24 (5 rnds): sc all around (35)
Rnd 25 - Rnd 26 (2 rnds): ((red yarn) 6 sc, (white yarn) 6 sc) x 2 times, (red yarn) 6 sc, (white yarn) 5 sc (35)
Rnd 27 - Rnd 29 (3 rnds): sc all around (35)
Rnd 30: (back loop only) (3 sc, sc dec) x 7 times (28)
Rnd 31: (2 sc, sc dec) x 7 times (21)
Rnd 32: (sc, sc dec) x 7 times (14)
Rnd 33: sc dec x 7 times (7)


Fasten off and sew the hole close


Wings on the head (make 2)
With white yarn,
Row 1: ch 6 (6)
Row 2: ss to 4th stitch, (tr, dc) in a stitch, dc

Fasten off, leaving a length of yarn for sewing


Star (make one with normal yarn, one with the thinner yarn)
With white yarn,
Rnd 1: 5sc into magic ring (5)
Rnd 2: (ch 2, ss into 2nd ch, sc into next stitch in magic ring) x 5 times (15)

Fasten off, leaving a length of yarn for sewing


Shield
With light blue yarn,
Rnd 1: 6sc into magic ring (6)
Rnd 2: sc inc x 6 times (12)
Change to red yarn,
Rnd 3: (sc, sc inc) x 6 times (18)
Change to White yarn,
Rnd 4: (2 sc, sc inc) x 6 times (24)
Change to red yarn,
Rnd 5: (3 sc, sc inc) x 6 times (30)

Fasten off, leaving a length of yarn for sewing


Assembly

Sew the wings to the head

Sew the big star to the chest

Sew the small star to middle of the shield

Sew the shield to side of body

Captain America and Princess Leia

My friend had requested me to make The Geeky Hooker's version of Princess Leia and Captain America he saw on http://www.boredpanda.com/crochet-pop-characters-monsters-geeky-hooker/
and I finally finished making them.


I have a request for the patterns and have gotten permission from the original designer to share them so I will be tidying up the patterns and sharing them soon! :)

Snow White and Prince Amigurumi Pattern (Free)

After I published the seven dwarfs pattern sometime back, I have been receiving requests for Snow White and Prince pattern. I made slightly different design of Snow White and Prince so that the ones my friend got for her wedding will be unique :D Hope you enjoy this version!


This is a free pattern, please do not sell this pattern or claim it as your own. If you want to share this pattern, please link back to this page. If you are selling the finished dolls, please credit Snacksies Handicraft Corner for the patterns.

There will be 2 patterns on this page, one for Snow White and one for Prince.

Materials:

Using fingering yarn with 2.5mm hook will produce a Snow White of about 11cm/4.3in tall and Prince of about 12cm/ 4.7in tall. They will be slightly taller than the seven dwarfs if the same yarn thickness is used.

All yarn threads are assumed to be of the same thickness.
Flesh colored yarn
Yellow yarn
Blue yarn
Light Blue yarn
Red yarn
Brown yarn
Tan yarn
Black yarn
White Yarn
Red Embroidery Thread
Black Embroidery Thread
Safety Eyes 6mm x4 (based on fingering yarn, use a bigger size if using a thicker yarn)
Felting needle + pink felting wool OR pink felt and glue
Stuffing

Abbreviations:
sc - single crochet
sc inc - single crochet increase
sc dec - single crochet decrease
ss - slip stitch
ch - chain stitch
hdc - half double crochet
hdc inc - half double crochet increase
dc - double crochet
bo - bobble stitch with 3 double crochet
Rnd - Round


Pattern for Snow White

Head
With flesh colored yarn,
Rnd 1: 6sc into magic ring (6)
Rnd 2: sc inc x 6 times (12)
Rnd 3: (sc, sc inc) x 6 times (18)
Rnd 4: (2 sc, sc inc) x 6 times (24)
Rnd 5: (3 sc, sc inc) x 6 times (30)
Rnd 6: (4 sc, sc inc) x 6 times (36)
Rnd 7: (5 sc, sc inc) x 6 times (42)
Rnd 8 - Rnd 14 (7 rnds): sc all around (42)
Rnd 15: (5 sc, sc dec) x 6 times (36)
Rnd 16: (4 sc, sc dec) x 6 times (30)
Rnd 17: (3 sc, sc dec) x 6 times (24)
Rnd 18: (2 sc, sc dec) x 6 times (18)
Rnd 19: (4 sc, sc dec) x 3 times (15)
Rnd 20: sc all around (15)
Fasten off

Insert the eyes between Rnd 11 - Rnd 12, about 6 stitches apart.
Sew the mouth at Rnd 13

Put stuffing in


Body
Attach blue yarn to head,
Rnd 1: (4 sc, sc inc) x 3 times (18)
Rnd 2: (5 sc, sc inc) x 3 times (21)
Rnd 3 - Rnd 7 (5 rnds): sc all around (21)
Change to yellow yarn,
Rnd 8: (back loop only) sc all around (21)
Rnd 9 - Rnd 13 (5 rnds): sc all around (21)
Rnd 14: (6 sc, sc inc) x 3 times (24)
Rnd 15: sc all around (24)
Rnd 16: (7 sc, sc inc) x 3 times (27)
Rnd 17: sc all around (27)
Rnd 18: (8 sc, sc inc) x 3 times (30)
Rnd 19: (back loop only) (3 sc, sc dec) x 6 times (24)
Rnd 20: (2 sc, sc dec) x 6 times (18)

*stuff

Rnd 21: sc dec x 9 times (9)
Rnd 22: (sc, sc dec) x 3 times (6)

Fasten off and sew the hole close.


Skirt
Attach yellow yarn to the front loops of Rnd 8
Rnd 1: sc all around (21)
Rnd 2: hdc inc x 21 times (42)
Rnd 3: hdc all around (42)
Rnd 4: (2 hdc, hdc inc) x 14 times (56)
Rnd 5 - Rnd 7 (3 rnds): hdc all around (56)
Rnd 8: (13 hdc, hdc inc) x 4 times (60)
Rnd 9: hdc all around (60)


Hair
(Note: from Rnd 13 onwards, the ch stitches at end of the rnd/row is not included in the stitch counts)
With black yarn,
Rnd 1: 6sc into magic ring (6)
Rnd 2: sc inc x 6 times (12)
Rnd 3: (sc, sc inc) x 6 times (18)
Rnd 4: (2 sc, sc inc) x 6 times (24)
Rnd 5: (3 sc, sc inc) x 6 times (30)
Rnd 6: (4 sc, sc inc) x 6 times (36)
Rnd 7: (5 sc, sc inc) x 6 times (42)
Rnd 8 - Rnd 12 (5 rnds): sc all around (42)
Rnd 13: sc all around, 2 ch, turn (42)
(Now crocheting in rows)
Row 14: (bo, 2 sc) x 7 times, bo, ch, turn (22)
Row 15: sc dec, 18 sc, sc dec, ch, turn (20)
Row 16: (bo, 2 sc) x 6 times, bo, sc (20)

Fasten off

Hair Fringe
There will be 20 stitches of Rnd 13 left. Find the middle 18 stitches for the fringe.
Attach black yarn,
Row 1: ss, sc, 3 hdc, dc, hdc, sc, 2 ss, sc, hdc, dc, 3 hdc, sc, ss (18)

Fasten off, leaving a length of yarn for sewing


Hands (make 2)
With flesh colored yarn,
Rnd 1: 5sc into magic ring (5)
Rnd 2 - Rnd 6 (5 rnds): sc all around (5)
Change to light blue yarn,
Rnd 7: 2 sc, sc inc, 2 sc (6)
Rnd 8: (2 sc, sc inc) x 2 times (8)
Rnd 9: sc all around (8)
Rnd 10: (2 sc, sc dec) x 2 times (6)
Fasten off, leaving a length of yarn for sewing.
Stuff.

Sew the hole close. Do not cut the yarn yet as it will be used for sewing onto the body later.


Ribbon
With red yarn,
Row 1: Ch 17 (17)
Row 2: sc from 2nd stitch until the end, ch, turn (16)
Row 3: (2 sc, hdc, 2 dc, hdc, 2 sc) x 2 times (16)
Fasten off, leaving a length of yarn for sewing.

Fold the 2 ends of the ribbon to the middle and sew them together. Wrap red yarn around the middle tightly to make the ribbon shape.


Assembly for Snow White
Sew the hands to the body.

Sew the hair to the head.

Sew the ribbon to the hair.

Felt the felting wool or glue the felt to make the cheeks


Pattern for Prince

Head
With flesh colored yarn,
Rnd 1: 6sc into magic ring (6)
Rnd 2: sc inc x 6 times (12)
Rnd 3: (sc, sc inc) x 6 times (18)
Rnd 4: (2 sc, sc inc) x 6 times (24)
Rnd 5: (3 sc, sc inc) x 6 times (30)
Rnd 6: (4 sc, sc inc) x 6 times (36)
Rnd 7: (5 sc, sc inc) x 6 times (42)
Rnd 8: (6 sc, sc inc) x 6 times (48)
Rnd 9 - Rnd 15 (7 rnds): sc all around (48)
Rnd 16: (6 sc, sc dec) x 6 times (42)
Rnd 15: (5 sc, sc dec) x 6 times (36)
Rnd 16: (4 sc, sc dec) x 6 times (30)
Rnd 17: (3 sc, sc dec) x 6 times (24)
Rnd 18: (2 sc, sc dec) x 6 times (18)
Rnd 19: (4 sc, sc dec) x 2 times (15)
Fasten off

Insert the eyes between Rnd 12 - Rnd 13, about 7 stitches apart.
Sew the mouth at Rnd 14

Put stuffing in


Body
Attach blue yarn to head,
Rnd 1: (4 sc, sc inc) x 3 times (18)
Rnd 2 - Rnd 3 (2 rnds): sc all around (18)
Rnd 4: (2 sc, sc inc) x 6 times (24)
Rnd 5 - Rnd 8 (4 rnds): sc all around (24)
Change to light blue yarn,
Rnd 9: (back loop only) sc all around (24)
Rnd 10 - Rnd 11 (2 rnds): sc all around (24)
Put stuffing in

Remove or add a few sc until you reach the middle of the back or front of the body. Ch 3, ss to 12th stitch. This should split the body into 2 parts. These 2 parts will be the legs and you will be crocheting a circle on each part to make the legs. Make sure that the body is divided into 2 parts in the middle of the body.


Leg (to be done on each part, the first leg can be continued above. For the 2nd leg, attach yarn to Rnd 8 above)
Rnd 1 - Rnd 2 (2 rnds): 15 sc, including the chain stitches (15)
Rnd 3: (3 sc, sc dec) x 3 times (12)
Rnd 4: sc all around (12)
Rnd 3: (4 sc, sc dec) x 3 times (9)
Fasten off and stuff

Body continued (to make the part of the top below the belt)
Locate the middle 12 front loops of Rnd 9 on the front of the body. The start and end should be at the sides of the body.

Attach blue yarn to the front loops,
Row 1: 12 sc, ch, turn (12)
Row 2: sc dec, 8 sc, sc dec, ch, turn (10)
Row 3: sc dec, 6 sc, sc dec, ch, turn (8)
Row 3, sc all the way (8)

Repeat for the back of the body.

Hair
With brown yarn,
Rnd 1: 6sc into magic ring (6)
Rnd 2: sc inc x 6 times (12)
Rnd 3: (sc, sc inc) x 6 times (18)
Rnd 4: (2 sc, sc inc) x 6 times (24)
Rnd 5: (3 sc, sc inc) x 6 times (30)
Rnd 6: (4 sc, sc inc) x 6 times (36)
Rnd 7: (5 sc, sc inc) x 6 times (42)
Rnd 8: (6 sc, sc inc) x 6 times (48)
Rnd 9 - Rnd 16 (8 rnds): sc all around (48)
Row 10: sc, hdc, 2 dc, 2 ss, 7 dc, hdc, sc, 2 ss, sc, hdc, sc, ss (21)

Fasten off, leaving a length of yarn for sewing


Hands (make 2)
With flesh colored yarn,
Rnd 1: 7sc into magic ring (7)
Rnd 2: sc all around (7)
Rnd 3: sc, sc dec, sc, sc dec, sc (5)
Change to white yarn,
Rnd 4: sc inc x 5 times (10)
Rnd 5 - Rnd 11 (7 rnds): sc all around (10)
Rnd 12: sc dec, sc, sc dec, sc, sc dec x 2 times (6)
Fasten off, leaving a length of yarn for sewing.
Stuff.


Shoes (make 2)
(Note: base of shoe is done in oval rounds)
With tan yarn,
ch 3 (3)
Rnd 1: skip first chain, 5 sc in 1 stitch, 3 sc in 1 stitch (8)
Rnd 2: sc inc x 5 times, sc inc x 3 times (16)
Rnd 3: (back loop only) sc all around (16)
Rnd 4: sc, sc dec x 4 times, 7 sc (12)
Rnd 5: sc, sc dec x 2 times, 7 sc (10)
Rnd 6 - Rnd 7 (2 rnds): sc all around (10)

Fasten off, leaving a length of yarn for sewing

Attach tan yarn to front loops of Rnd 3,
Rnd 1: ss all around (16)
Fasten off.

Put stuffing in


Belt
With tan yarn, surface crochet around the waist

Details on top
With yellow yarn, ss all around the bottom of the top to form the yellow border


Assembly
Sew the hands to the body

Sew the shoes to the legs

Sew the hair to the head

Felt the felting wool or glue the felt to make the cheeks


Hope you enjoy the pattern!

Bride and Groom Amigurumi Pattern

Finally finished the bride and groom amigurumi pattern! Took me really a long time as it is a long and detailed pattern with 28 pages and 71 photos. Glad that it is finally done :) The pattern can be found here.


Hope to work out a free pattern of Snow White and Prince next. A few people had requested me for it a while back. Hope to get it out soon :)

Mini Dog Amigurumi

Inspired by a fellow amigurumist and decided to try making a mini amigurumi using lace yarn.


The dog is only about 3cm/ 1 inch tall! This is the smallest amigurumi I have made to date :D

Check out the instagram of the amigurumist who inspired me! His amigurumis are way smaller than this and always amaze me.

Bride and Groom Amigurumi Crochet

Finally finished the groom for the bride I did a while back!

Tried the shoes a lot of times to make the groom able to stand on his own with his big head :P Glad that I am able to do it at the end. :) The made-to-order can be found here. Working on the pattern, hope to finish it soon :)

Big Ginger the Gingerbread Man Amigurumi

Had a custom order for a 10 inches tall gingerbread man order about 2 weeks back. Finally did one after trying a few times :)


It is available as a made-to-order now and I hope to be able to do the pattern in time for this year's Christmas!

Customized Order for Boo the Ghost

Received a customized order for Boo the Ghost with embroidered eyes for baby safe and no hat.


This is the first time I am using embroidery for eyes and I am glad it turned out ok :)

I used a blue temporary fabric marker from Clover to draw the eyes before sewing them on. Then, I used the removal provided to remove the marks around the edge. However, the blue color came back after a few hours! Luckily the marks did not come back after removing for a second time. This is the first time I am using a temporary fabric marker and I wonder if this is normal?

Webstore Launched!

Finally managed to do a webstore that I always wanted. Had spent the previous month trying around different platforms and designs and asking friends for advice and finally settled on one :)

I will be having a launch sale from now till 26th May 10am Singapore time (+8GMT). Most items will be at 10%-15% off!


Seven Dwarfs Crochet Amigurumi Pattern (free)

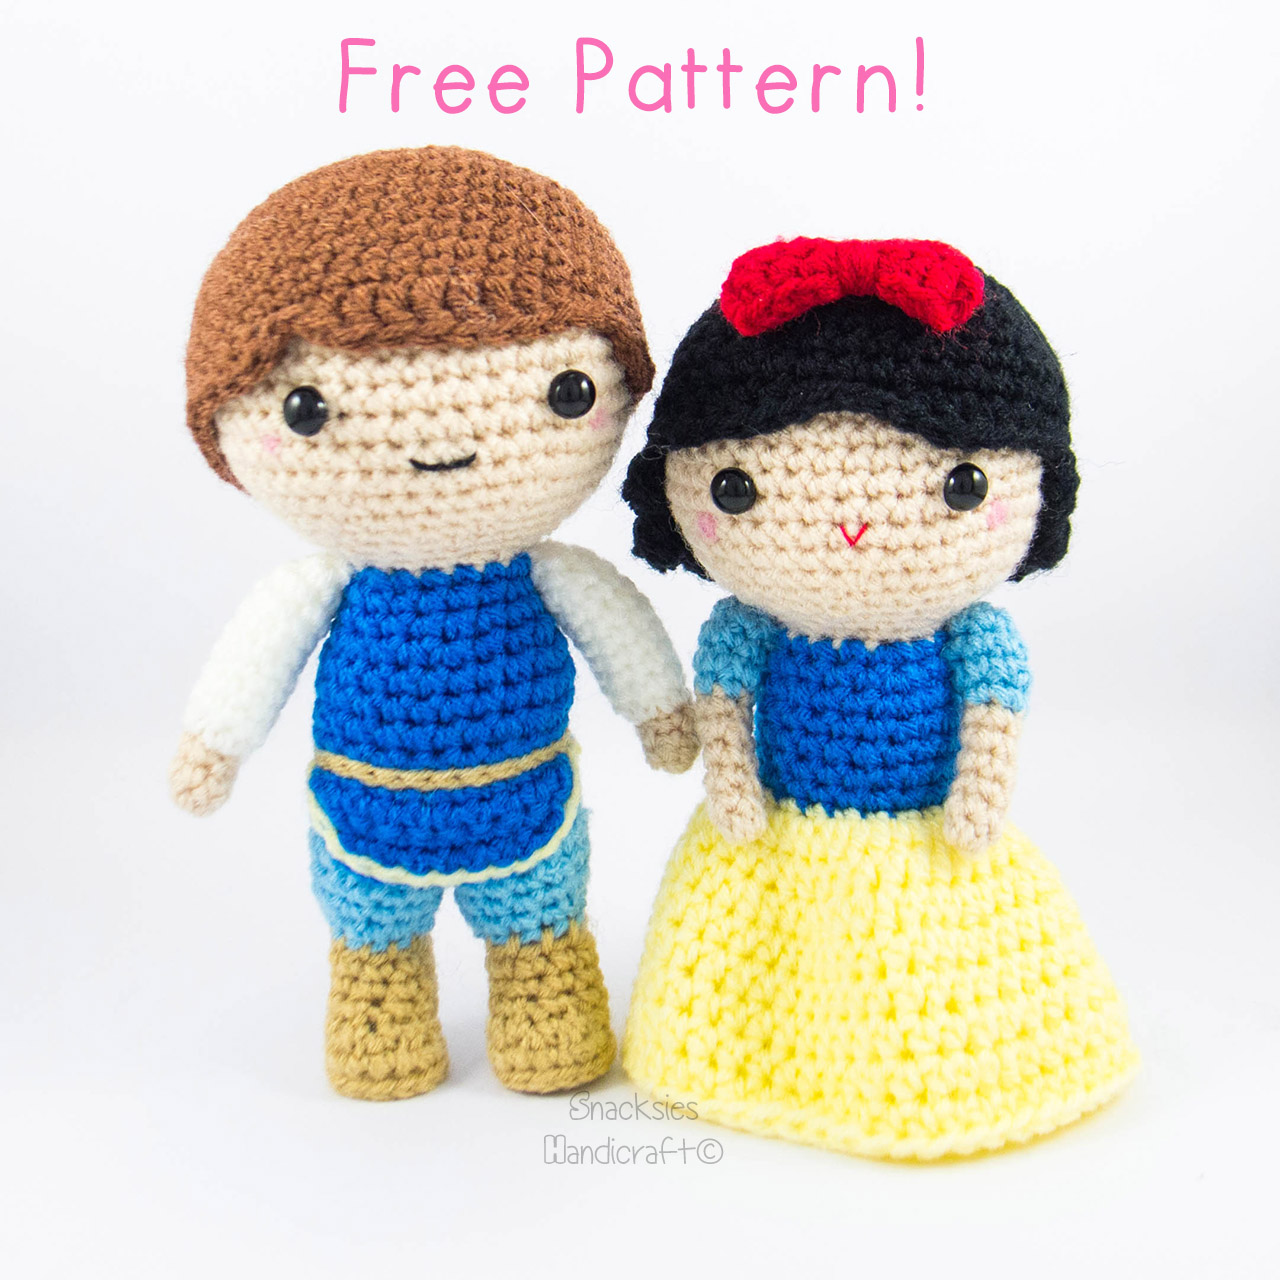
I have several requests for the pattern of the seven dwarfs I made recently, so I am sharing out today :)


This is a free pattern, please do not sell this pattern or claim it as your own. If you want to share this pattern, please link back to this page. If you are selling the finished dolls, please credit Snacksies Handicraft Corner for the patterns.

There will be 2 patterns in this page, one for the 6 dwarfs and one for Dopey as he look so different. For the 6 dwarfs, there will be some parts of the pattern that is slightly different for each of them, such as the clothes colors, top length and beard length. A nose has to be made for Sneezy too. I will put notes in the pattern to point out the differences so do read carefully :)

For the dwarfs' clothes colors, I tried to follow that of Disneyland dwarfs as closely as possible. However, sometimes the brand of yarn I used does not have the exact color, so I used the next closest color. The yarn colors listed will be according to what I used. You may want to google search for Disneyland dwarfs if you want the exact color.


Materials:

Using fingering yarn with 2.5mm hook will produce a dwarfs of about 8cm/3.1in tall.

All yarn threads are assumed to be of the same thickness.
Flesh colored yarn
Yellow yarn
Orange yarn
Blue yarn
Green yarn
Light Blue yarn
Red yarn
Purple yarn
Dark brown yarn
Bright green yarn
Light purple yarn
Tan yarn
Light pink yarn
Black yarn
Safety Eyes 5mm x12 (based on fingering yarn, use a bigger size if using a thicker yarn)
Black wire (to be bent into glasses shape for Doc)
Felting needle + pink felting wool OR pink felt and glue
Stuffing

Abbreviations:
sc - single crochet
sc inc - single crochet increase
sc dec - single crochet decrease
ss - slip stitch
ch - chain stitch
sc3tog - single crochet 3 together
bo - bobble stitch with 3 double crochet
Rnd - Round

Pattern for 6 dwarfs

Nose (for Sneezy only)
With light pink yarn,
Rnd 1: 4sc into magic ring    (4)
Rnd 2: sc all around   (4)

Fasten off and leave a length of yarn for sewing

Head
With flesh colored yarn,
Rnd 1: 6sc into magic ring    (6)
Rnd 2: sc inc x 6 times    (12)
Rnd 3: (sc inc, sc) x 6 times    (18)
Rnd 4: (sc inc, 2 sc) x 6 times    (24)
Rnd 5: (sc inc, 3 sc) x 6 times    (30)
Rnd 6: (sc inc, 4 sc) x 6 times    (36)
Rnd 7: (sc inc, 5 sc) x 6 times    (42)
Rnd 8 - Rnd 11 (4 rnds): sc all around    (42)
Rnd 12: (sc dec, 5 sc) x 6 times    (36)
Rnd 13: (sc dec, 4 sc) x 6 times    (30)
Rnd 14: (sc dec, 8 sc) x 3 times    (27)
Rnd 15: (sc dec, 7 sc) x 3 times    (24)


Fasten off

For sleepy, sew the eyes at Rnd 10, 5 stitches apart
For the rest of the 5 dwarfs, insert the eyes between Rnd 10 - Rnd 11, 5 stitches apart

For Grumpy, sew the eyebrows above his eyes

For Sneezy, sew the nose from Rnd 11 and the mouth below the nose
For the rest of the 5 dwarfs, sew the mouth at Rnd 12

Put stuffing into the head


Body (please refer to the picture for the respective clothes colors)
Attach top color yarn to head,
Rnd 1: sc all around (24)
Rnd 2: (3 sc, sc inc) x 6 times (30)
Rnd 3: (4 sc, sc inc) x 6 times (36)
Rnd 4 - Rnd 5 (2 rnds): sc all around (36)
Rnd 6: (11 sc, sc inc) x 3 times (39)
Change to bottom color yarn,
Rnd 7: (back loop only)(11 sc, sc dec) x 3 times (36)
Rnd 8: (4 sc, sc dec) x 6 times (30)
Put stuffing in

Remove or add a few sc until you reach the middle of the back or front of the body. Ch 5, ss to 15th stitch. This should split the body into 2 parts. These 2 parts will be the legs and you will be crocheting a circle on each part to make the legs. Make sure that the body is divided into 2 parts in the middle of the body.

Leg (to be done on each part, the first leg can be continued above. For the 2nd leg, attach yarn to Rnd 8 above)
Rnd 1 : 20 sc, including the chain stitches (20)
Rnd 2 : (2 sc, sc dec) x 5 times (15)
Rnd 3 : (sc, sc dec) x 5 times (10)
Fasten off and stuff

Body continued (to make the part of the top below the belt, note the different lengths for each dwarf)
Attach top color yarn to the front loops of Rnd 7 of body and sc all around (39)

For Angry and Sleepy, sc 2 more rounds to make a longer length (39)

Fasten off


Hat (please refer to the picture for the respective hats colors)
With hat color yarn,
Rnd 1: 6sc into magic ring (6)
Rnd 2: (sc, sc inc) x 3 times (9)
Rnd 3 - Rnd 4 (2 rnds): sc all around (9)
Rnd 5: (2 sc, sc inc) x 3 times (12)
Rnd 6: sc all around (12)
Rnd 7: (3 sc, sc inc) x 3 times (15)
Rnd 8 - Rnd 10 (3 rnds): sc all around (15)
Rnd 11: (2 sc, sc inc) x 5 times (20)
Rnd 12: (sc, sc inc) x 10 times (30)
Rnd 13: sc all around (30)
Rnd 14: (2 sc, sc inc) x 10 times (40)
Rnd 15 - Rnd 20 (6 rnds): sc all around (40)

Fasten off, leaving a length of yarn for sewing


Hands (make 2, sleeves color should match top color)
With flesh colored yarn,
Rnd 1: 6sc into magic ring (6)
Rnd 2: sc all around (6)
Change to top color yarn yarn,
Rnd 3 - Rnd 6 (4 rnds): sc all around (6)

Fasten off, leaving a length of yarn for sewing
Put stuffing in


Shoes (make 2, refer to picture for respective colors)
(Note: base of shoe is done in oval rounds)
With shoe color yarn,
ch 3 (3)
Rnd 1: skip first chain, 5 sc in 1 stitch, 3 sc in 1 stitch (8)
Rnd 2: sc inc x 5 times, sc inc x 3 times (16)
Rnd 3: (back loop only) sc all around (16)
Rnd 4: sc, sc dec x 4 times, 7 sc (12)
Rnd 5: sc, sc dec x 2 times, 7 sc (10)
Rnd 6 - Rnd 7 (2 rnds): sc all around (10)

Fasten off, leaving a length of yarn for sewing
Put stuffing in


Beard (Bashful, Angry)
With white yarn,
Row 1: ch 3, turn (3)
Row 2: sc from 2nd stitch until the end, ch, turn (2)
Row 3 - Row 4 (2 rows): sc all the way, ch, turn (2)
Row 5: sc, sc inc, ch, turn (3)
Row 6 - Row 7 (2 rows): sc all the way, ch, turn (3)
Row 8: sc inc, 2 sc, 3 ch, turn (4)
Row 9 : (bo, sc) x 2 times, ch, turn (4)
Row 10: sc inc x 2 times, 2 sc, 3 ch, turn (6)
Row 11 : (bo, sc) x 3 times, ch, turn (6)
Row 12: sc all the way, 3 ch, turn (6)
Row 13 : (bo, sc) x 3 times, ch, turn (6)
Row 14: sc all the way, 3 ch, turn (6)
Row 15 : (bo, sc) x 3 times, ch, turn (6)
Row 16: sc dec x 2 times, 2 sc, 3 ch, turn (4)
Row 17 : (bo, sc) x 2 times, ch, turn (4)
Row 18: sc dec, 2 sc, 3 ch, turn (3)
Row 19 - Row 20 (2 rows): sc all the way, ch, turn (3)
Row 21: sc, sc dec, ch, turn (2)
Row 22 - Row 23 (2 rows): sc all the way, ch, turn (2)
Row 24: sc all the way (2)
Fasten off, leaving a length of yarn for sewing

Beard (Sleepy)
With white yarn,
Row 1: ch 3, turn (3)
Row 2: sc from 2nd stitch until the end, ch, turn (2)
Row 3 - Row 4 (2 rows): sc all the way, ch, turn (2)
Row 5: sc, sc inc, ch, turn (3)
Row 6 - Row 7 (2 rows): sc all the way, ch, turn (3)
Row 8: sc inc, 2 sc, 3 ch, turn (4)
Row 9 : (bo, sc) x 2 times, ch, turn (4)
Row 10: sc inc x 2 times, 2 sc, 3 ch, turn (6)
Row 11 : (bo, sc) x 3 times, ch, turn (6)
Row 12: 4 sc, sc inc x 2 times, 3 ch, turn (8)
Row 13 : (bo, sc) x 4 times, ch, turn (8)
Row 14: 4 sc, sc dec x 2 times, 3 ch, turn (6)
Row 15 : (bo, sc) x 3 times, ch, turn (6)
Row 16: sc dec x 2 times, 2 sc, 3 ch, turn (4)
Row 17 : (bo, sc) x 2 times, ch, turn (4)
Row 18: sc dec, 2 sc, 3 ch, turn (3)
Row 19 - Row 20 (2 rows): sc all the way, ch, turn (3)
Row 21: sc, sc dec, ch, turn (2)
Row 22 - Row 23 (2 rows): sc all the way, ch, turn (2)
Row 24: sc all the way (2)
Fasten off, leaving a length of yarn for sewing

Beard (Sneezy, Happy, Doc)
With white yarn,
Row 1: ch 3, turn (3)
Row 2: sc from 2nd stitch until the end, ch, turn (2)
Row 3 - Row 4 (2 rows): sc all the way, ch, turn (2)
Row 5: sc, sc inc, ch, turn (3)
Row 6 - Row 7 (2 rows): sc all the way, ch, turn (3)
Row 8: sc inc, 2 sc, 3 ch, turn (4)
Row 9 : (bo, sc) x 2 times, ch, turn (4)
Row 10: sc all the way, 3 ch, turn (4)
Row 11 : (bo, sc) x 2 times, ch, turn (4)
Row 12: sc all the way, 3 ch, turn (4)
Row 13 : (bo, sc) x 2 times, ch, turn (4)
Row 14: sc all the way, 3 ch, turn (4)
Row 15 : (bo, sc) x 2 times, ch, turn (4)
Row 16: sc all the way, 3 ch, turn (4)
Row 17 : (bo, sc) x 2 times, ch, turn (4)
Row 18: sc dec, 2 sc, 3 ch, turn (3)
Row 19 - Row 20 (2 rows): sc all the way, ch, turn (3)
Row 21: sc, sc dec, ch, turn (2)
Row 22 - Row 23 (2 rows): sc all the way, ch, turn (2)
Row 24: sc all the way (2)
Fasten off, leaving a length of yarn for sewing


Belt
With black yarn, surface crochet around the waist
With yellow yarn, sew a rectangle in the middle for the belt buckle


Assembly
Sew the hands to the body

Sew the shoes to the legs

Sew the beard to the face

For Doc, bent the wire such that it become a glasses and put on face and sew it a little at the sides to make it stay

Sew the hat to the head

For Bashful, felt the felting wool or glue the felt to make the cheeks


Pattern for Dopey

Head
With flesh color yarn,
Rnd 1: 6sc into magic ring    (6)
Rnd 2: sc inc x 6 times    (12)
Rnd 3: (sc inc, sc) x 6 times    (18)
Rnd 4: (sc inc, 2 sc) x 6 times    (24)
Rnd 5: (sc inc, 3 sc) x 6 times    (30)
Rnd 6: (sc inc, 4 sc) x 6 times    (36)
Rnd 7 - Rnd 12 (6 rnds): sc all around    (36)
Rnd 13: (sc dec, 4 sc) x 6 times    (30)
Rnd 14: (sc dec, 3 sc) x 6 times    (24)
Rnd 15: (sc dec, 2 sc) x 6 times    (18)
Rnd 16: (sc dec, sc) x 6 times    (12)

Fasten off

Insert the eyes between Rnd 10 - Rnd 11, 5 stitches apart
Sew mouth at Rnd 12

Put stuffing in head


Ear (Make 2)
With flesh color yarn,
Row 1: ch 3 (3)
Row 2: skip first chain, sc, (2 dc, sc) in a chain  (4)

Fasten off, leaving a length of yarn for sewing

Sew ears to head starting from Rnd 10


Body
Attach bright green yarn to head
Rnd 1: (sc inc, sc) x 6 times    (18)
Rnd 2: (sc inc, 2 sc) x 6 times    (24)
Rnd 3 - Rnd 6 (4 rnds): sc all around    (24)
Change to yellow yarn,
Rnd 7: (back loop only) sc all around (24)
Rnd 8: (4 sc, sc dec) x 4 times (20)
Put stuffing in

Remove or add a few sc until you reach the middle of the back or front of the body. Ch 4, ss to 10th stitch. This should split the body into 2 parts. These 2 parts will be the legs and you will be crocheting a circle on each part to make the legs. Make sure that the body is divided into 2 parts in the middle of the body.

Leg (to be done on each part, the first leg can be continued above. For the 2nd leg, attach yarn to Rnd 8 above)
Rnd 1 : 14 sc, including the chain stitches (14)
Rnd 2 : (5 sc, sc dec) x 2 times (12)
Rnd 3 : (4 sc, sc dec) x 2 times (10)
Fasten off and stuff

Body continued (to make the part of the top below the belt)
Note :This part will be done in rows.

Attach bright green yarn to the front loops of Rnd 8 of body
Row 1: 20 sc, ch, turn (20)
Row 2: sc dec, 16 sc, sc dec, ch, turn (18)
Row 3 - Row 4 (2 rows): 18 sc, ch, turn (18)
Row 5: 18 sc (18)


Shoes, hands and hat are the same as the other dwarfs

Assemble the same way as the other dwarfs


Hope you enjoy making the dwarfs! The patterns are typed out from my scribbles and are not tested yet, so if you come across any typos do highlight to me. Thanks!